Category Archives: Food

Week Ten: Grand Finale!

Standard

For the grand finale, I decided to remake the best recipe I’d made this summer, which happened to be Loaded Mashed Potato Bombs, which I’ve listed the recipe for in a previous post. I also baked kielbasa, because I’m super Polish and wanted something small and quick to go with the bombs. We get our kielbasa from a local place called Filipek’s which I highly recommend! And then of course I steamed some random broccoli, even though I’m not a big fan, because we had some fresh stalks available.

My mother regrets that we did not document all the disasters of the night, as there were quite a few.  After mixing the dry ingredients together, I tripped and needless to say, flour went everywhere. Then because the dark chocolate hardened after I’d already melted it, in trying to remelt it, the chocolate burned and our microwave was disgustingly smoky. In prepping the cake mixture, I accidentally used dark brown sugar instead of light brown sugar.  I’m not really knowledgable about the nature of brown sugar and what that meant for my dessert.  But let’s just say the end result was very decadent and needed vanilla ice cream to compensate for this fact.

The recipe also calls for dulce de leche as one of the main ingredients.  I just thought it looked delicious in the picture on Pinterest, but truly had no notion of where to find this delicacy.  While looking for icing sugar and the aforementioned topping, someone in the baking aisle told me there was a process to making these kinds of things.  With a swift search google search, I was able to pick up ingredients I needed. Dulce de leche was basically just sweetened condensed milk. The icing sugar just required processing normal sugar and then adding in corn starch and grinding the two together.  In one article, it seemed as though it would take 3 or so hours to make dulce de leche, so, I wanted to take caution and make it at the same time as other items. This ended up being not such a great idea, because the dulce de leche hardened and didn’t really have the desired result. It was also a bit difficult to have to convert measurements all the time, but I tried!

Chocolate and Coconut Cake with Dulce De Leche and Cashews 

230g dark chocolate

411g dulce de leche (1 ½ tins)
170g unsalted butter, softened 
350g light brown sugar 
3 eggs, separated
375g plain flour 
1 ½ tsp baking soda
1 ½ tsp baking powder
500ml buttermilk 
1 tsp vanilla extract
100g sweetened shredded coconut, plus extra for sprinkling on top

Icing

200g dark chocolate

225g unsalted butter, softened

250g icing sugar
1 tpsp buttermilk 

170g dark chocolate
100g cashew nuts
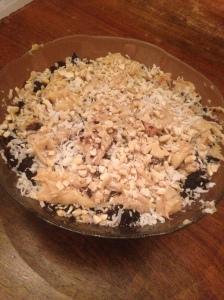
photo 1-37
Note: This recipe actually yields 4 cake layers, even though I only made two which didn’t stay together.  Whatever you do, do not put the widest cake layer at the top because the chocolate will drip all over the place, not all seductively over each layer as it should. 

Make the cakes. Preheat oven to 170 Celsius and line two 7” or 8″ cake pans with baking paper, or 4 sandwich tins. Every time a recipe has suggested baking paper, I used spray instead.  This is the first time that’s proved problematic.  When I own my own house, I’ll probably have my own baking paper.  Melt 230g chocolate over double boiler and set aside. I couldn’t find bars of dark chocolate, so I just microwaved dark chocolate chips.  Beat butter and sugar until pale. Add the yolks one by one followed by the melted chocolate. In a jug, pour vanilla into buttermilk and stir. Combine dry ingredients in a large bowl and fluff up with a fork. Add the flour and buttermilk to the chocolate mixture in thirds, alternating between the two.  Beat the egg whites until soft peaks form, fold them into the chocolate mixture and divide the batter among the pans.  In my tiredness, I forgot to beat the egg whites before folding them.  I don’t know if this had an effect on anything.  Bake for 45 minutes, or until a skewer comes out clean, bake for 25 minutes if using sandwich tins. Cool cakes. 

Make the icing. Melt 200g chocolate over double boiler. Beat butter, buttermilk and icing sugar in a freestanding mixture on high speed until light and fluffy (3 minutes). Pour the melted chocolate in whilst the mixer is still running and mix until fully incorporated. 

Melt the rest of the chocolate (170g) over a double boiler. 

Assemble the cake. Split the cakes horizontally using a serrated knife and brush away the crumbs (there will be a lot!). Place the first layer on a cake plate and spread a quarter of the chocolate icing on top, then spread a quarter of the dulce de leche.  Because of the hardened state of mine, it was really difficult to spread.  Place the second layer on top and repeat – same with the third. Place the last cake on top and spread with the melted chocolate, letting it drip to the sides. Sprinkle with cashews and leftover coconut. Lasts for 3 days if kept covered. 
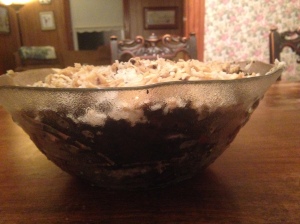
Attempted side view

Attempted side view

Week Nine: Balsamic-Glazed Ravioli with Cherries & 6-Layer Grilled Banana Split

Standard

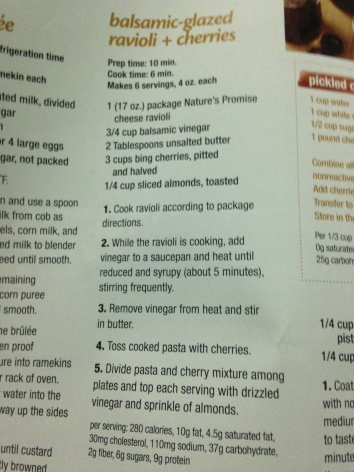
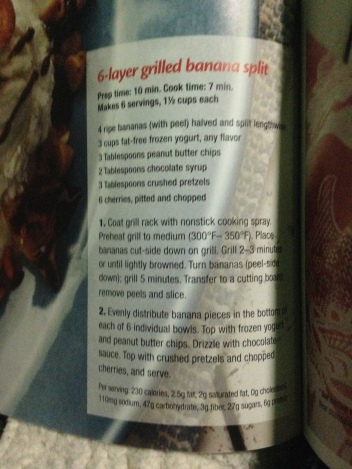
This week my father brought home a magazine called Healthy Ideas that he’d gotten at Stop & Shop, so I decided to make something from there.

photo 1-33

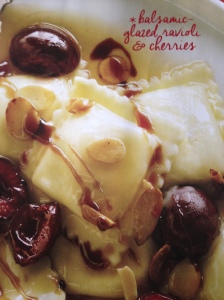
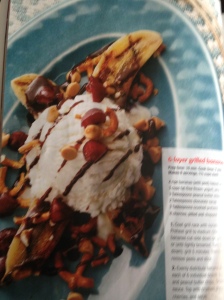
How the recipe is supposed to look

How the recipe is supposed to look

I was actually proud of the fact that I toasted the almonds myself.  We couldn’t find toasted and halved almonds.  So naturally my father’s solution was to buy both.  I’d seen my dad cook almonds with green beans before, so I put some almonds in with olive oil, and cooked ’em up!

This was also the week that I discovered that raviolis were in with frozen foods.  My own conclusion is that perhaps this is because of the cheese, but in light of raviolis filled with other things, the conclusion reached by others seemed to be that it’s just because of the way they’re made.

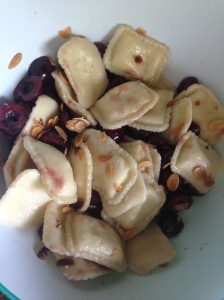
Assembly

Assembly

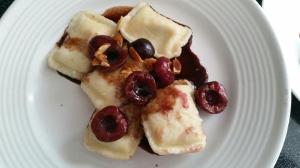
Final piece

Final piece

photo 2-32

As you can see, my version didn't look quite as photogenic as this shot.

As you can see, my version didn’t look quite as photogenic as this shot.

photo 2-34 photo 1-36 photo 3-36 photo 2-35

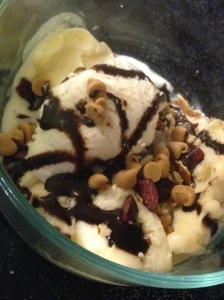
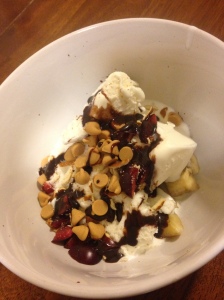
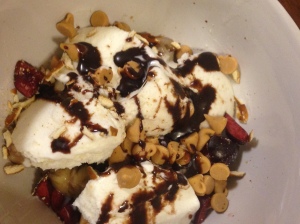
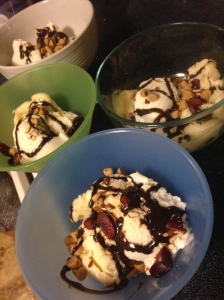
The cheese, dressing, and cherry contrast was a very succulent, interesting flavor.  I used the George Foreman to grill the bananas, which left a delicious smell in the kitchen.  The recipe for the desert said to put the bananas chopped up on the bottom, but if I were making this again, I’d probably distribute it throughout. I think another change I’d make would be to melt the peanut butter chips into a sauce.

Week Eight: Chicken Alfredo, Chocolate Chip Cookie Skillet, and Roasted Garlic Mashed Potatoes

Standard

Now, my boyfriend came over this weekend, and wanted me to make mashed potatoes, but also jumped at the chance to have chicken alfredo when I listed various chicken dishes that could be made. So, naturally I made both for him. I chose a different recipe than last time for the potatoes, because I wasn’t super pleased with how it came out, although others seemed to be.

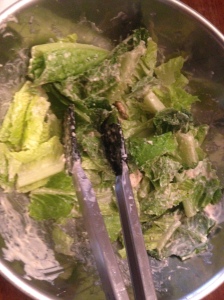
I also made a Caesar salad to go along with the meal, which clearly got very little photographic attention.

I also made a Caesar salad to go along with the meal, which clearly got very little photographic attention.

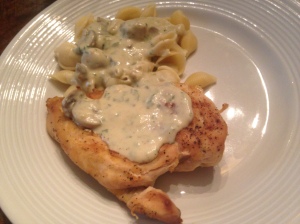
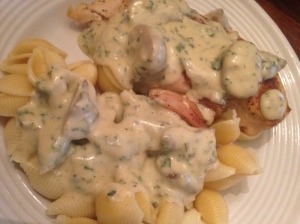
FLORENTINE CHICKEN ALFREDO 
4 boneless chicken breasts 
Salt and pepper 
2 tablespoons butter 
8 ounces fresh mushrooms, sliced 
1 ounce fresh spinach, cut into thin strips * 
Alfredo Sauce, see recipe below

Season the chicken with salt and pepper. Grill on an outdoor or indoor grill; keep warm while making the rest of the recipe.

Meanwhile, sauté the mushrooms in the 2 tablespoons of butter until tender and set aside. Make the Alfredo sauce. Add the cooked mushrooms and spinach to the sauce and heat through over very low heat just until the spinach has wilted. Gradually whisk in a little water if the sauce is too thick. Serve the sauce over the chicken.

Makes 4 servings 
Do not freeze/Does not reheat well 

* You’ll need about 1 2/3 cups “confetti” sized strips (chiffonade).

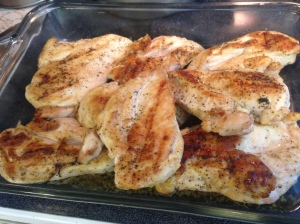
Chicken before being marinaded

Chicken before being marinaded

AMAZING ALFREDO SAUCE 
4 tablespoons butter 
2 cloves garlic, minced 
1/4 teaspoon pepper 
1 cup heavy cream 
3 ounces parmesan cheese, grated or shredded 
2 ounces mozzarella cheese, shredded 
Water, if needed (see my comments below)

Blurry but delicious

Blurry but delicious

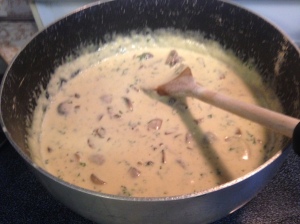
In a medium saucepan, melt the butter over low heat. Add the garlic, pepper and cream and simmer about 2 minutes minutes. Gradually whisk in the parmesan cheese. Simmer another 10 minutes until the sauce has thickened and the cheese has completely melted. Very gradually whisk in the mozzarella cheese, whisking constantly.

Per Serving: 646 Calories; 51g Fat; 43g Protein; 5g Carbohydrate; 1g Dietary Fiber; 4g Net Carbs

photo 2-30 photo 5-24
It’s very satisfying making sauce, as you get to enjoy the smell and process of it thickening.  I doubled the sauce because I doubled the chicken, but I would advise making more sauce with this meal to cover the pasta as well. A sauce this good should last a few more meals!
 

Prep Time: 15 minutes

Cook Time: 15 minutes

Total Time: 30 minutes

Yield 2 servings

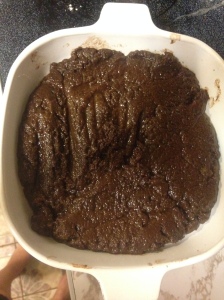
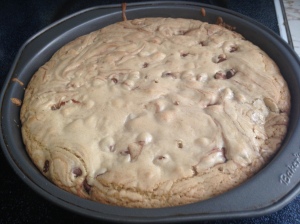
So hilariously enough, in knowing nothing about cooking and generally having bad luck, I messed up this recipe the first time. In reflection, I think I may have put tablespoons instead of teaspoons of vanilla extract in, which would explain why the recipe wouldn’t become solid. I also added everything on heat. So naturally, when I folded the chocolate chips in, they melted straight off and I ended up with this mess.

While this looking very moist here, it ended up being a crumbly substance which was good on top of ice cream, but didn't serve many other functions.

While this looks very moist here, it ended up being a crumbly substance which was good on top of ice cream, but didn’t serve many other functions.

Now I check twice before putting ingredients in. This sent me into quite a panic, as I wanted to give my boyfriend the most delicious meal possible. So I ended up taking an extra day than I had planned in order to try again. Thankfully I had enough materials.

INGREDIENTS

  • 1 3/4 cups all-purpose flour
  • 1/2 teaspoon baking soda
  • 1/2 teaspoon salt
  • 14 tablespoons unsalted butter, divided
  • 1/3 cup sugar
  • 1/2 cup dark brown sugar, packed
  • 2 teaspoons vanilla extract
  • 1 large egg
  • 1 large egg yolk
  • 1 cup chocolate chips
  • Ice cream, for serving

photo 5-23

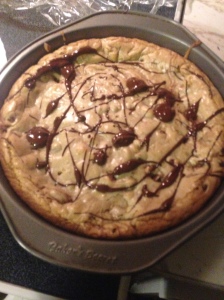
Much different in appearance!

These are the results of the second attempt, much more delicious in appearance!

INSTRUCTIONS

  • Preheat oven to 375 degrees F. Lightly coat 2 5-inch cast iron skillets with nonstick spray.
  • In a large bowl, combine flour, baking soda and salt; set aside.
  • Melt 10 tablespoons butter in a medium saucepan over medium heat. Cook, whisking constantly, until the foam subsides and the butter begins to turn a golden brown, about 3 minutes. Remove from heat; strain through cheesecloth or fine sieve. I don’t have one of these, but would consider using one for future cooking endeavors.  I believe it might serve to rid extra fat from meats, but not 100% sure.
  • Stir in remaining 4 tablespoons butter until completely melted. Whisk in sugars and vanilla until well combined. Whisk in egg and egg yolk until well combined. Add flour mixture, beating just until incorporated. Gently fold in chocolate chips.
  • Divide mixture into the prepared skillets. Place into oven and bake until edges are golden brown but center is still moist, about 12-15 minutes.
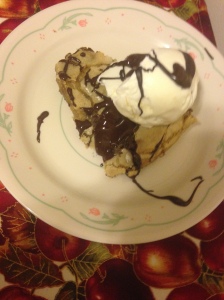
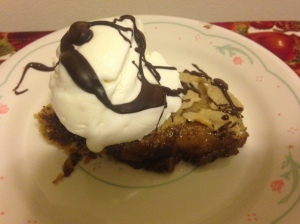
  • Serve immediately, topped with ice cream, if desired.
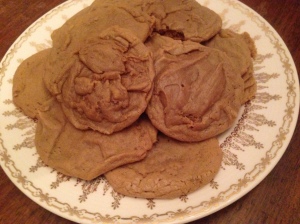
photo 5-25 photo 3-33

Kyle enjoying the meal, but more probably some joke I made in the instant.

Kyle enjoying the meal, but more probably some joke I made in the instant.

Prep Time: 15 minutes

Cook Time: 40 minutes

Yield: 10-12 servings

Apparently I have no pictures on my phone of these potatoes however. 


Ingredients

  • 5 pounds potatoes, peeled and cubed
  • 3 heads garlic
  • olive oil
  • salt/pepper
  • 8 tablespoons butter, softened & divided
  • 1 cup sour cream
  • 3/4 – 1 cup milk, room temp
  • 1 tablespoon white vinegar
  • fresh chives

Instructions

  1. To begin you’ll need to roast your garlic. Preheat the oven to 400 degrees and take a slice off the top of the garlic heads, not the end with the stem. (enough to expose the cloves) THIS SMELLED AMAZING!
  2. Place the garlic heads in a small oven safe pan with the cut side up. Drizzle the garlic with a little olive oil, and sprinkle with salt and pepper. Cover the pan with foil and roast for 4-50 minutes or until they are golden brown and softened.
  3. Allow the garlic to set until cool enough to handle, then squeeze from the bottom of each head of garlic to push the roasted cloves out. Set aside.
  4. Place the cubed potatoes in a large pot of salted water and bring to a boil on the stove. The water should be salty almost like the ocean. Boil until fork tender.
  5. Drain the potatoes and place them in a large mixing bowl. Add 4 tablespoons of the butter, the roasted garlic, and sour cream to the bowl. Blend on medium speed until combined.
  6. With the mixer on, add a large pinch of salt and begin drizzling in the room temperature milk. As the potatoes get light and fluffy, increase the speed on the mixer. When all the milk is added in, drizzle in the vinegar and whip for a minute or two until light and fluffy.
  7. Check for seasoning and add salt if needed.
  8. Scoop the potatoes into a large serving bowl and create a shallow well in the center.
  9. Melt the remaining butter and pour into the well of the potatoes. Garnish with fresh snipped chives and a little cracked black pepper.

Week Seven: Meat Loaf, Mashed Potatoes, Bacon Pea Salad, and Brown Sugar Coconut Oil Cookies

Standard
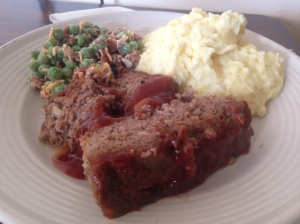
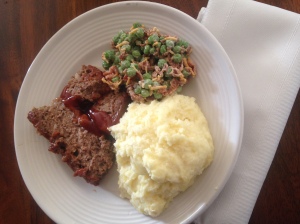
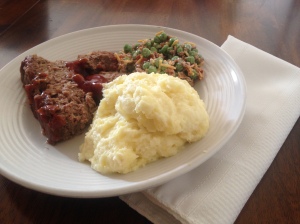
Continuing the theme of making meats I enjoy, I decided to have a go at meatloaf.  I also thought it was time to make actual mashed potatoes and a salad including my favorite vegetable, peas.  It seems like this is when I started getting really into photographing the whole process.
 
 
TOTAL TIME: Prep: 15 min. Bake: 1 hour + standing
MAKES: 6-8 servings
 
meatloaf mixture

meatloaf mixture

Ingredients

  • 2 eggs
  • 3/4 cup milk
  • 2/3 cup finely crushed saltines
  • 1/2 cup chopped onion
  • 1 teaspoon salt
  • 1/2 teaspoon rubbed sage
  • Dash pepper
  • 1-1/2 pounds ground beef
  • 1 cup ketchup
  • 1/2 cup packed brown sugar
  • 1 teaspoon Worcestershire sauce
 photo 4-22

Directions

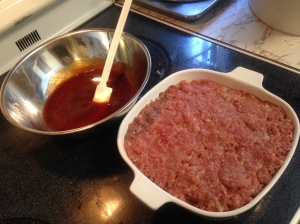
  1. Preheat oven to 350°. In a large bowl, combine the first seven ingredients. Add beef; mix lightly but thoroughly. Shape into an 8×4-in. loaf in an ungreased 15x10x1-in. baking pan.
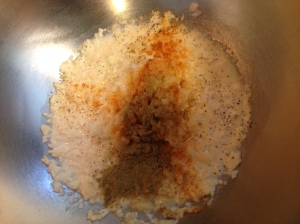
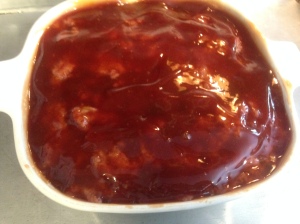
  2. In a small bowl, combine remaining ingredients, stirring to dissolve sugar; remove 1/2 cup for sauce. Spread remaining mixture over meat loaf.
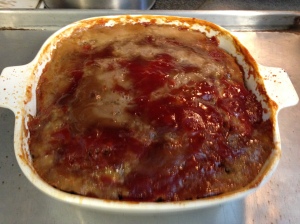
  3. Bake 60-65 minutes or until a thermometer reads 160°. Let stand 10 minutes before slicing. Serve with reserved sauce. Yield: 6 servings.

Nutritional Facts

1 serving (1 piece) equals 268 calories, 9 g fat (4 g saturated fat), 98 mg cholesterol, 810 mg sodium, 27 g carbohydrate, 1 g fiber, 20 g protein.

photo 4-23

before

after

after

Ultimate Mashed Potatoes

Directions

  1. In a large bowl, beat eggs. Add milk, saltines, onion, salt, sage and pepper. Crumble beef over mixture and mix well. Shape into an 8-in. x 4-in. oval in an ungreased shallow baking pan.
  2. Combine the remaining ingredients; spread 3/4 cup over meat loaf. Bake at 350° for 60-65 minutes or until no longer pink and a meat thermometer reads 160°; drain. Let stand 10 minutes before slicing. Serve with remaining sauce. Yield: 6-8 servings.

photo 5-20

Ingredients
  • 5 Yukon Potatoes – They are gold in color
  • 3 garlic cloves
  • ¼ cup of onion – finely diced
  • 4 ounces of sour cream
  • 2 ounces of light cream cheese
  • ¼ cup of parmesan cheese
  • ¼ cup of butter
  • Chives – Garnish
 photo 1-28
Instructions
  1. Cut each potato into 4 pieces – I leave the skin on
  2. Place the potatoes, garlic ,and onions into boiling water – I use a large stock pot
  3. Boil till potatoes are tender
  4. Drain (none of the potatoes, garlic, or onions should come out)
  5. Place the potato mix back into the pot – over low heat add cream cheese, parmesan cheese, sour cream , and butter
  6. Mash like it is going out of style
  7. Place in serving dish and garnish with chives
  8. Enjoy!
This cook claimed that they really knew their potatoes, as they were Irish.  But I think these potatoes seemed to taste a little too much of sour cream for my taste.
 

cook’s notes:

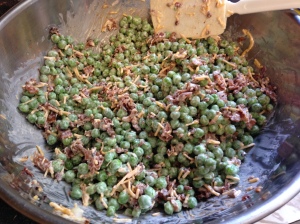
  • I prefer to use frozen peas that have thawed overnight in the refrigerator. I prefer the texture and flavour of them over canned peas. If you have fresh peas, blanch them as you would to freeze them and use them after they’ve chilled.
  • We served scoops of this on top of salad the other day and loved it. Bonus: No dressing necessary.
  • This can be served immediately after stirring it together, but tastes even better if allowed to sit, tightly covered, in the refrigerator for an hour or up to three days. It should be eaten within 3 days of being made, which is NOT a problem. Trust me.

photo 1-24photo 5-18

Ingredients

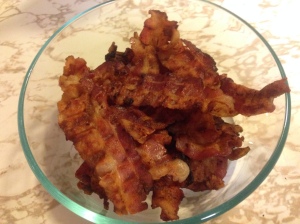
  • 1 pound of bacon, cooked according to package instructions, drained and crumbled or finely chopped
  • 2 pounds frozen peas, thawed in the refrigerator overnight
  • 3/4 cup coarsely grated sharp Cheddar cheese
  • 1/2 small red onion, peeled, and finely chopped
  • 1/2 cup of mayonnaise
  • 1/2 teaspoon kosher salt
  • 1/2 teaspoon coarsely ground black pepper
  • 1/4 teaspoon paprika

photo 4-25

Instructions

Stir together all of the ingredients and serve immediately, or (preferably) put in a tupperware, Gladware, or other tightly covered container in the refrigerator to give the flavours a chance to meld for an hour but up to three days prior to serving. Give it a gentle stir from top to bottom before serving.

photo 3-27 photo 5-21 photo 4-24

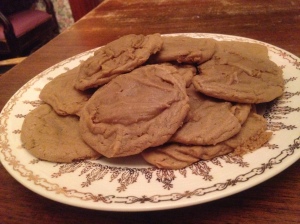
I let my brother pick the dessert!

Soft Batch Dark Brown Sugar Coconut Oil Cookies

YIELD: about 15 medium-sized cookies

PREP TIME: 10 minutes

COOK TIME: 8 minutes

TOTAL TIME: 18 minutes

INGREDIENTS:

1/2 cup coconut oil, softened (softened to the consistency of soft butter; not rock hard and not runny or melted, see below)
1 cup dark brown sugar, packed
1 large egg
2 tablespoons vanilla extract (yes tablespoons, not teaspoons), or to taste

-I surprisingly ran out of vanilla extract and had to put in a little almond extract, but they ended up tasting fine.
1 tablespoon unsulphered mild to medium molasses (use very dark or Blackstrap at your own risk because its very pungent and bitter for baking)
1 3/4 cup all-purpose flour
2 teaspoons corn starch
1 teaspoon baking soda
1/4 teaspoon salt, optional and to taste

DIRECTIONS:

  1. To the bowl of a stand mixer fitted with the paddle attachment, combine coconut oil, egg, sugar and beat on medium-high speed to cream until light and fluffy, 4 to 5 minutes. Note – Coconut oil should be the consistency of soft butter like you’d use to cream with sugar and eggs in traditional cookies. If coconut oil is rock hard, microwave it in a small bowl for 5 to 10 seconds or just until it begins to soften. If coconut oil is runny or melted, place it in the freezer momentarily until it firms up. A tiny amount of runniness is fine; it’s an oil and that happens. But do not use melted or purely liquid coconut oil because you can’t effectively cream a liquid; it would be like trying to cream liquid butter.
  2. Stop, scrape down the sides of the bowl, add the vanilla, molasses, and beat to incorporate, 1 to 2 minutes. Add the flour, corn starch, baking soda, optional salt, and mix until just combined, about 1 minute.
  3. Using a medium cookie scoop, form mounds that are 2 heaping tablespoons in size; or divide dough into approximately 15 to 16 equal-sized pieces. Place dough mounds on a large plate, and slightly flatten each mound. Very important to get the dough mounds in the exact shape you want to bake them in because after chilling, flattening or re-shaping them is very difficult. Cover with plasticwrap, and refrigerate for at least 2 hours; up to 5 days. Do not bake these cookies with dough that has not been properly chilled because they will spread.
  4. Preheat oven to 350°F, line a baking sheet with a Silpat Non-Stick Baking Mat, parchment, or spray with cooking spray. Place dough on baking sheet, spaced at least 2 inches apart; I bake a maximum of 8 per sheet. Bake for 8 to 10 minutes, or until tops have just set, even if slightly undercooked, pale, and glossy in the center. They firm up as they cool and I recommend the lower end of the baking range because they taste best when softer. The cookies in the photos were baked for 8 minutes, with trays rotated once midway through baking.
  5. Allow cookies to cool on the baking sheet for 5 to 10 minutes before moving. Store cookies in an airtight container at room temperature for up to 1 week, or in the freezer for up to 3 months. Alternatively, unbaked dough can be stored in an airtight container in the refrigerator for up to 5 days, or in the freezer for up to 3 months, so consider baking only as many cookies as desired and save the remaining dough to be baked in the future when desired.

photo 3-24 photo 2-24

Week Six: Meatball Parmigiana Sliders, Panera-Style Mac & Cheese, and Chocolate-Covered Peanut Butter Balls

Standard

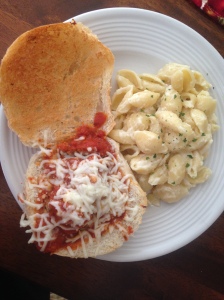
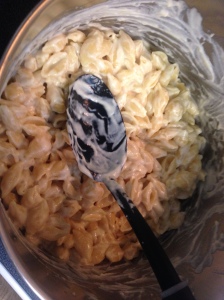
Even though I’m not a fan of her racist outbursts, Martha Stewart’s recipe for sliders is delicious.  When I made them they ended up being on huge rolls though, hardly tiny appetizers.  I also wanted to make creamy mac and cheese like they serve at Panera so I tried a copycat recipe that was amazing!!

Meatball Parmigiana Sliders

INGREDIENTS

FOR THE MEATBALLS

  • 2 slices white or sandwich bread, torn into 1-inch pieces
  • 1/2 cup whole milk
  • 8 ounces ground beef (85 percent lean)
  • 8 ounces ground pork
  • 4 ounces ground veal
  • 1/2 cup finely grated pecorino Romano or Parmesan cheese (1 ounce)
  • 3 tablespoons coarsely chopped fresh flat-leaf parsley
  • garlic clove, minced
  • 1 large egg
  • Coarse salt
  • Marinara Sauce

FOR THE SANDWICHES

  • 2 dozen brioche rolls, split
  • 1 1/2 cups coarsely grated mozzarella cheese (5 ounces)
  • 1/2 cup finely grated pecorino Romano or Parmesan cheese (1 ounce)
  • Small basil leaves

DIRECTIONS

  1. STEP 1

    Make the meatballs: Soak bread in milk for 5 minutes. Gently mix bread and milk with meats, pecorino Romano, parsley, garlic, egg, and 1 teaspoon salt. Refrigerate for at least 30 minutes.

  2. STEP 2

    Roll mixture into twenty-four 1-ounce balls (each about the size of a golf ball).

  3. STEP 3

    Heat sauce in a large heavy pot over medium heat. Drop meatballs into sauce, and bring to a gentle simmer. Cook, partially covered, until meatballs are cooked through, 20 to 25 minutes.

  4. STEP 4

    Make the sandwiches: Preheat oven to 400 degrees. Working in batches, arrange rolls, cut side up, on a baking sheet. Place 1 meatball, a spoonful of sauce, 1 tablespoon mozzarella, and 1 teaspoon pecorino Romano on bottom halves. Bake until cheese melts, about 3 minutes. Sandwich with basil.

photo 4-18

Panera-Style Mac & Cheese

Ingredients
8 to 12 ounces small or medium Shell pasta
2 tablespoon butter
2 tablespoon all-purpose flour
2 cups Heavy Whipping Cream
3 slices white American cheese, chopped
2 ounces Cream Cheese
1 ounce shredded Parmesan
6 ounces shredded extra-sharp White Vermont cheddar
(for a lighter flavor, use only 4oz instead of 6oz)
1/2 tablespoon Dijon mustard
1/2 teaspoon kosher salt
2-3 drops Frank’s hot sauce

Directions
1. Prepare pasta according to package directions. While pasta is cooking, do steps 2 – 4

2. Melt butter over low heat. Whisk in flour and cook 1 minute, whisking constantly.

3. Gradually whisk in milk; cook over medium heat, whisking until mixture starts to thicken. Reduce heat to low.

4. Add cheeses, mustard, salt, and hot sauce, stirring until cheese melts and sauce is smooth. Add a small amount of whole milk to thin out if needed. It should look kind of like vanilla pudding, but a little bit thinner.

5. Stir in pasta and cook over medium heat for 1 minute (or until thoroughly heated).

Serves 4-6

photo 1-21

Chocolate-Covered Peanut Butter Balls

I had been hankering to make a dessert with peanut butter for a while.
 
Recipe
 
photo 3-21
Mix together:
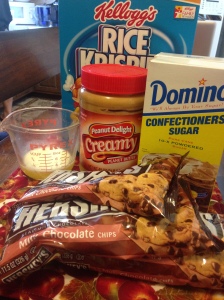
2 cup creamy peanut butter
3 cup rice crisps
1lb (3cup) powdered sugar1/4 cup melted butter
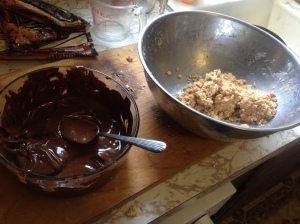
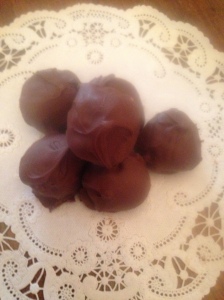
Make balls and dip in melted:
2 (maybe 3) package milk chocolate chips
 
photo 2-21
Put on cookie sheets in fridge to harden. Enjoy.

Makes about 70 balls.

Okay so just to give a few pointers since I’ve been making these since I was a little child. They are kind of labor intensive. Once you get the powdered sugar in, it is almost impossible to stir. I wash my hands really good and end up using my hands to mix in the rice krispies. I gave a friend the recipe and she used a mixer. She said it turned out good, but I am too afriad to ruin a good thing so I stick with what I know.

Depending on the peanut butter you use, you may have to add more powdered sugar. You will know when you try to make a ball. If it is too sticky, add more. I’ve always had to add more except this year I used my new favorite peanut butter, Skippy Natural with honey. The recipe worked perfectly. If the balls are too crumbly, add more peanut butter.

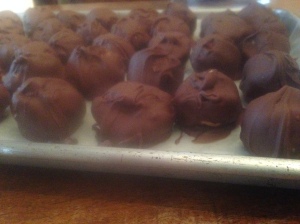
The original recipe my mom used called for a bag of semi sweet chocolate chips and a bar of milk chocolate. They are still really good like this, but I prefer just to go all out and use all milk chocolate. Yep that’s how I roll. And it seems that no matter how much chocolate I melt, I have to melt more so make sure you have extra on hand.

photo 3-23 photo 5-17

Week Five: Mashed Potato Cakes, Parmesan Honey Pork Roast & Deep Dish Chocolate Chip Caramel Cookies

Standard
I decided to make this meal, because I wanted to start getting experience with making different kinds of meat that I enjoy.  This recipe was an interesting experience for me, because I got to use the roaster for the first time. This was so simple and made my whole house smell delicious! Also, all the different versions of potatoes intrigued me, so I decided to make another one of these versions!
 
 
Prep time: 15 mins
Cook time: 30 mins
 
Ingredients
  • Instant mashed potatoes (made from 1 full packet — follow directions on the box) (You can obviously use homemade mashed potatoes too. That will probably taste even better. I don’t usually have any though, because I always just eat every last scrap of potatoes I make. But, FYI, 1 packet of instant flakes makes about 3-4 cups mashed potatoes, so if you’re using homemade stuff, adjust your other ingredient measurements accordingly.) I USED HOMEMADE POTATOES!
  • ⅔ cup Colby Jack cheese, grated
  • 1-1/2 cups Panko breadcrumbs
  • 1 large egg
  • 2 tbsp chives, chopped
Directions
  1. In a large bowl, mix all ingredients until everything is uniformly incorporated.
  2. Using your hands, scoop out generous portions of the potato mixture, and shape it into patties. (These can be as big as you want. My patties were about 1 inch thick and 2 inches across.)
  3. Spray a large pan/skillet with Pam and set it on the stove over medium/high heat. (Fair warning, this took me forever!)
  4. Cook mashed potato patties 3-4 at a time, about 1-2 minutes on each side. (If you’re using a pan/skillet with a cover, put the lid on when you’re cooking each side. This will trap the heat and cook the patties all the way around, even on the edges.)
  5. Serve warm, with sour cream and bacon bits.
Potato Cakes!

Potato Cakes!

Slow Cooker Parmesan Honey Pork Roast

Ingredients:

1 (2-3 pound) boneless pork roast
2/3 cup grated Parmesan cheese
1/2 cup honey
3 Tbsp soy sauce
2 Tbsp dried basil
2 Tbsp minced garlic
2 Tbsp olive oil
1/2 tsp salt
2 Tbsp cornstarch
1/4 cup cold water

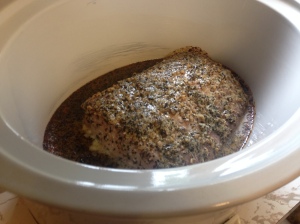
Pork roast in the cooker

Pork roast in the cooker

Spray slow cooker with non-stick cooking spray. Place roast in slow cooker. In a small bowl, combine the cheese, honey, soy sauce, basil, garlic, oil and salt; pour over pork. Cover and cook on low for 6-7 hours or until a meat thermometer reads 160°.
Remove meat to a serving platter; keep warm. Skim fat from cooking juices; transfer to a small saucepan. Bring liquid to a boil. Combine cornstarch and water until smooth. Gradually stir into pan. Bring to a boil; cook and stir for 2 minutes or until thickened. Slice roast; serve with gravy.
 
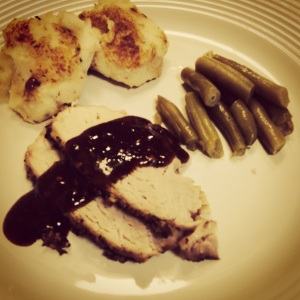
Finished meal, photo creeds to my brother Tristan (ignore the instagram filter)

Finished meal, photo creeds to my brother Tristan 


Prep time:  10 mins
Cook time:  15 mins
Total time:  25 mins
Serves: 12
 
Ingredients
  • ¾ cup butter, softened
  • ¾ cup brown sugar
  • ¼ cup white sugar
  • 1 egg
  • 2 tsp vanilla extract
  • 2 cups all-purpose flour
  • 1 tsp baking soda
  • 2 tsp cornstarch
  • ½ tsp salt
  • 1 cup milk chocolate chips
  • 12 Ghiradelli Caramel squares, unwrapped

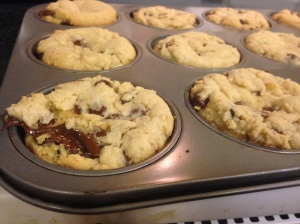
Cookies just out of the oven

Cookies just out of the oven

Instructions
  1. Preheat oven to 350 degrees F. Grease a muffin top pan or deep dish cookie pan with cooking spray and set aside.
  2. In a medium bowl, whisk together the flour, soda, cornstarch and salt, and set aside. Meanwhile, in a large bowl with an electric mixer, beat together the butter and sugars until creamy, about a minute. Beat in the egg and vanilla to combine.
  3. Gradually add flour mixture to the butter mixture, beating well after each addition. Once dough has come together, stir the chocolate chips in by hand with a wooden spoon.
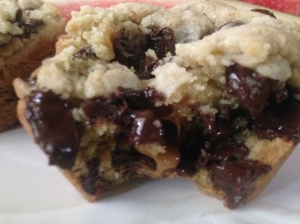
  4. Drop a Tablespoonful of dough into the bottom of each cavity. Gently press it to cover the bottom of each cavity. Top with an unwrapped square. Top the candy with an additional Tablespoonful of dough and gently press the top dough ball to cover and enclose the candy.
  5. Bake the cookies for approx. 12-15 minutes or until the centers are set and the edges are golden and lightly crisped. Allow the cookies to cool in the pan about 5 minutes before gently removing to wire racks to cool completely. You can loosen them from the pan very carefully with a butter knife.
  6. **Note: You can also make this recipe without a deep dish cookie pan–just drop heaping Tablespoonfuls of dough 2-3″ apart on a greased or silicone-lined cookie sheet.**

photo 2-19 photo 5-14


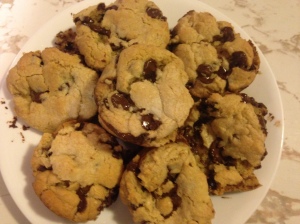
THESE WERE PHENOMENAL!

Week Four: Crab Rangoons, General Tso’s Chicken & Pineapple Coconut Snowballs

Standard

Now, at Smith, I had the most delicious crab rangoon and had been craving it every since. But in trying to make this meal, I think I ended up with one of the worst I made this summer. It was not melt-in-your-mouth amazing. The crab and cream cheese did not mesh together as well as I had hoped. If I were to attempt this recipe again, I would recommend filling the wontons excessively, put more than you think necessary in the middle, because mine definitely needed more.

Crab Rangoons:
Ingredients:
1/8 tsp garlic powder
1 8-oz package cream cheese
6 oz of crab meat (I found a 12-oz package and used half)
2 green onions, thinly sliced
2 teaspoons Worcestershire sauce
1/2 teaspoon soy sauce
48 wonton wrappers
2 eggs, beaten

Directions:
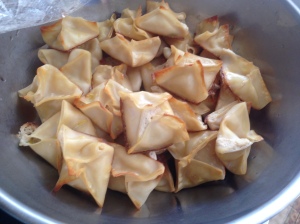
Preheat oven to 425 degrees, and lightly spray a baking sheet with cooking spray. Combine garlic powder, cream cheese, crab, green onions, Worcestershire sauce, and soy sauce in a bowl. Place 1 teaspoon of filling onto the center of each wonton skin. Brush the edges with beaten eggs and fold the wonton skin diagonally to form a triangle, pressing edges to seal. This part was a lot of fun; I felt very artistic! Create a crown by pulling both bottom corners together and sealing. Arrange the rangoons on the baking sheet and lightly spray with cooking spray. Bake for 12-15 minutes, just until golden brown.

Crab rangoons!

Crab rangoons!

This is my brother’s favorite Chinese treat, so I thought it would be good to try out. They’ve also been growing on me, but I believe this particular recipe was too spicy for me. Then again I did just eyeball some of the additions and was doubling the recipe to feed my family of five. So, something might have gone wrong there.

Homemade General Tso’s Chicken Recipe:
(Makes 4 servings)

Ingredients:
Chicken:
4-5 boneless, skinless chicken breasts cut into bite-sized pieces
3 eggs, beaten
1/2 cup cornstarch
Vegetable or peanut oil

Sauce:
1 Tablespoon vegetable or peanut oil
10 dried chili pods
4 teaspoons cornstarch
3 Tablespoons rice vinegar
4 Tablespoons rice wine
6 Tablespoons sugar
6 Tablespoons soy sauce

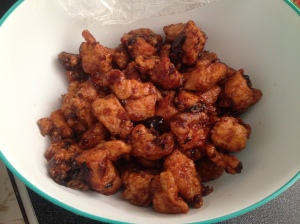
General Tsao's Chicken

General Tso’s Chicken

Directions:
In a large bowl, combine cornstarch and eggs.  Add the chicken to the bowl and toss to coat.  Heat 1-2 inches of vegetable or peanut oil in a large wok or pot over medium-high heat.  Add coated chicken to the hot oil and fry until golden brown on the outside and cooked through.  Remove cooked chicken from the oil and place on a plate with a paper towel over it and set aside.   In a medium sized mixing bowl, combine cornstarch, rice vinegar, rice wine, sugar and soy sauce.  Heat a skillet over medium heat and add oil.  Once oil is heated, add chili pods to the oil and stir-fry briefly just until you can smell them but they aren’t burned.  Add the mixing bowl with the rest of the sauce ingredients and heat until the sauce caramelizes into a glaze (2-3 minutes).  Add cooked chicken back to the sauce and toss until coated.  Serve over cooked rice. I didn’t do this, but it would’ve been a nice touch.

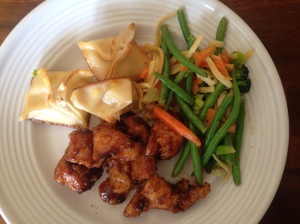
Whole meal, with some steamed vegetables.

Whole meal, with some steamed vegetables.

TOTAL TIME: Prep: 20 min. + chilling (at least six hours)
MAKES: 24 servings

Ingredients

  • 1 package (8 ounces) cream cheese, softened
  • 1 can (8 ounces) crushed pineapple, well drained
  • 2-1/2 cups flaked coconut

Nutritional Facts

1 piece (prepared with fat-free cream cheese) equals 67 calories, 5 g fat (5 g saturated fat), 1 mg cholesterol, 55 gm sodium, 4 g carbohydrate, 1 g fiber, 2 g protein. Diabetic Exchanges: 1 fat, 1/2 fruit.

Directions

  1. In a small bowl, beat cream cheese and pineapple until combined. Cover and refrigerate for 30 minutes.
  2. Roll into 1-in. balls; roll in coconut. Refrigerate for 6 hours or overnight. Yield: about 2 dozen.

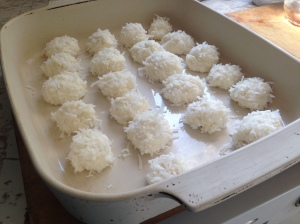
Dessert!

Dessert!

Week Three: Mashed Potato Bombs, Avocado Truffles, and Blackberry Cupcakes

Standard

So, in week three it obviously was necessary that I made some kind of potato recipe! This early into the game there were already complaints about lack of vegetables, so I decided to make something with avocados. The recipe that I found, however, was a lot more complicated time-wise and with ingredients than I could handle, so I only followed about half of the instructions.

I would recommend doubling the ingredients for the bombs, because after making them, I definitely wanted more and there were no leftovers for my family of five. That being said, the construction is complicated, so it would be more time consuming to do this.

Loaded Mashed Potato Bombs

Ingredients

    • 1 1/4 lbs. potatoes (I used a yellow skinned potato)
    • 3 tablespoons buttermilk (or milk– I used milk the first time in making these)
    • 1/8 cup sour cream
OR
    • Left over mashed potatoes (or packaged mashed potatoes)
Other
  • 1/8 teaspoon garlic powder
  • 1 1/2 tablespoons butter
  • 1/2 tablespoon sliced chives (or green onions)
  • 3 pieces of bacon cooked crisp and chopped or 2 tablespoons bacon bits
  • 1/3 cup shredded cheddar cheese
  • 10 3/4″ cubes of cheddar cheese
  • 1 roll of biscuit dough (10 biscuits)
  • salt and pepper to taste

Instructions

    1. Preheat oven to 350 degrees.
Mashed Potatoes
    1. Wash potatoes and poke with a fork a few times. Bake potatoes in oven 1 hour or microwave until soft. Allow to cool slighty. Slice each potato in 1/2 length wise. Scoop out the pulp and mash potatoes, buttermilk, sour cream, butter, garlic powder, salt and pepper until smooth. Stir in chives, bacon and shredded cheddar cheese. Let cool completely.
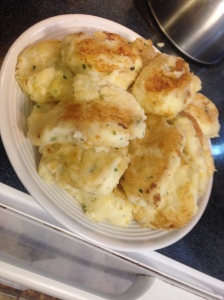
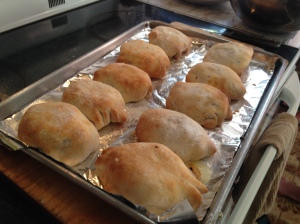
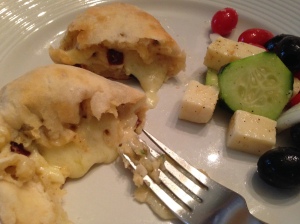
Assembled bombs!

Assembled bombs!

Assembly
  1. Wrap 1 1/2 tablespoons of mashed potatoes around each cube of cheese. Roll each biscuit with a rolling pin until big enough to enclose the potato ball. I will say that this step can be a little difficult and my second time making the bombs, I doubled up on biscuits so I could make them bigger.  Be sure to seal each biscuit completely to hold the cheese in.
  2. Place seam side down on a pan. Bake 15-20 minutes or until heated through and cheese is melted.
Finished product… delicious! (Ignore the random salad thrown in there).

Finished product… delicious! (Ignore the random salad thrown in there).

Avocado Truffles

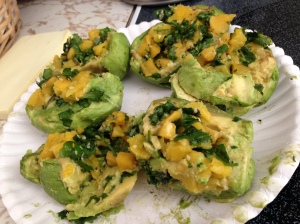
Cut an avocado in half, take out the pit. Scoop out some of the flesh, leaving a good amount intact, so that it holds its shape when you take off the skin. Mash the scooped avocado flesh, adding some squeezed lime juice. Then put the mashed mass back into the two avocado halves – distribute evenly.  There are endless possibilities for the filling. We love the classic combination of mango and avocado, so I made a simple salad of chopped mango, cilantro, black sesame seeds, and lime juice. (I put the recipe up in the words of the original people. I don’t know much about these things). Put the filling into the two halves. Assemble them back together and carefully peel off the skin. 

I did not use the following instructions when creating this meal, because I couldn’t find some of these ingredients and I had none of these in my home before making. It also seemed a little unnecessary to me, but I’m including them just in case. Have a ball.

For the coat, I used dried mango, black sesame seeds, pistachio, and freeze dried corn, peas, and red bell pepper. Grind these ingredients together with a mortar and pestle. Bathe the avocado in the ground coating, carefully turning to pick up the crumbles.

Less artistic attempt, yet still very vibrant!

Less artistic attempt, yet still very vibrant!

Blackberry Cupcake with Blackberry Buttercream Frosting

I warn you, these are amazing!

Ingredients

  • 3 6 oz packs blackberries
  • 1/3 cup milk, at room temperature
  • 6 large egg whites, room temperature
  • 2 tsp lemon juice
  • 2 1/4 cup cake flour, sifted
  • 1 3/4 cup sugar
  • 4 tsp baking powder
  • 1 tsp salt
  • 12 Tbsp unsalted butter (1 1/2 sticks), softened
  • For the frosting:
  • 2 sticks butter unsalted butter, softened
  • 1/2 tsp vanilla
  • 1/4 tsp almond extract
  • 5 cups confectioner’s sugar
  • 1 Tbsp meringue powder
  • pinch of salt
  • 1/4 cup blackberry puree (do not try to buy this ingredient, as I did… it makes itself during the recipe)
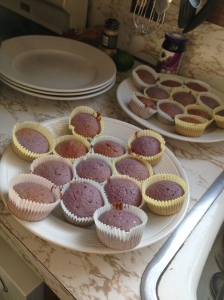
Pre-frosting cupcakes!

Pre-frosting cupcakes!

Instructions

  1. Preheat oven to 350 degrees and prepare two muffin pans with liners.
  2. Puree blackberries in a food processor or blender. Scrape into a fine mesh sieve set over a bowl. With a rubber spatula, work the blackberries through the sieve, leaving seeds behind. Remove 1/4 cup of puree for the frosting. Your mileage may vary but you should have ~2/3 cup of blackberry puree leftover.
  3. In small bowl, combine puree, milk, egg, lemon juice, and mix with fork until well blended. In bowl of stand mixer, add sifted flour, sugar, baking powder and salt and mix to combine. Continue beating at slow speed and add butter. Mix until combined and resembling moist crumbs.
  4. Add liquids and beat at medium speed for about 1 minute or until full and evenly combined. Stop mixer to scrape down the sides of the bowl and beat for 30 more seconds. Fill cupcake liners ~3/4 full.
  5. Bake for about 20 minutes or until a toothpick inserted in the center cupcake in each pan comes out clean. Let cupcakes cool in pans and then transfer to a covered plate.
  6. To make the frosting, cream butter and extracts until smooth.
  7. Mix in confectioner’s sugar, meringue powder, and salt and beat 2-3 minutes on high. I did not have meringue powder, so I called my grandmother up and she told me something I might use to thicken the frosting. So, my frosting is less than frosting, but certainly delicious.
  8. Add blackberry puree and beat for an additional minute. Adjust consistency, if desired, with additional confectioner’s sugar or water.

Notes

Yields: 24 cupcakes

Estimated time: 45 minutes

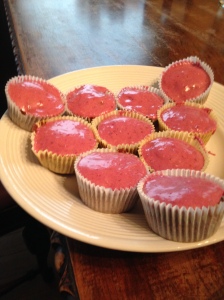
Yuuuum!

Yuuuum!

Week Two: Butternut Squash Mac & Cheese and Strawberry Brownie Kabobs

Standard

Here’s a link to this week’s delicious recipe from blogger PinchofYum… boo, just a pinch?!  Most of these recipes come from things I’ve pinned on my Pinterest food board. Of all the delectable meals, mac & cheese seems to push through the forefront, so much so that this summer may end up being a quest for the best recipe of mac & cheese. I figured I’d start off with something out of the ordinary though.  It also seemed like a good idea to start making desserts, as my board was half composed of them.  These did not disappoint.

BUTTERNUT SQUASH MAC N’ CHEESE WITH BACON, CARAMELIZED ONIONS, AND APPLES

Prep time:  5 mins
Cook time:  30 mins
Serves: 4
 
INGREDIENTS
  • ½ box whole grain elbow macaroni (about 2.5 cups dry)
  • 1 cup canned butternut squash puree
  • ¼ cup + 2 tablespoons evaporated milk
  • ¼ cup chicken or vegetable broth
  • 1 oz low fat cream cheese
  • 1 teaspoon salt
  • ½ cup shredded cheddar cheese
  • 1 tablespoon butter
  • ½ cup onions, sliced thinly
  • 1 large crispy apple, chopped or grated
  • 4 tablespoons crumbled bacon
 
INSTRUCTIONS
  1. Heat butter in a skillet over low heat. When melted, add onions and let caramelize for at least 30 minutes for the best flavor. Keep heat on low/low-medium.
  2. Cook the pasta according to directions. Drain and return to pan over low heat. Add butternut squash, chicken broth, evaporated milk, and cream cheese. When combined, add in salt.
  3. Add onions and apples to the pasta. Stir to combine and add a tablespoon more broth or milk if needed.
  4. Just before serving, mix in cheese and stir until melted. Top each serving with 1 tablespoon bacon.
 
NOTES
Because there’s very little butter, it can “dry out” quickly, especially once off the heat. Add a tablespoon of water, milk, or broth if you need to get it back to its original creaminess.  
 
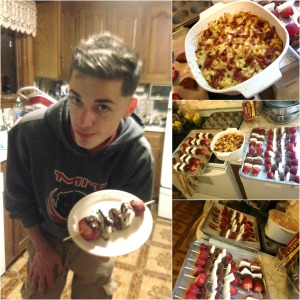
My brother was fortunate enough to receive the task of modeling the dessert for us. This time I made sure to create a collage on the gram for your enjoyment.

My brother was fortunate enough to receive the task of modeling the dessert for us. This time I made sure to create a collage on the gram for your enjoyment.

Week One: Penne Ala Vodka & Chicken Parmesan Meatballs

Standard

Naturally, in my first cooking exploit, I knew that I had to make penne ala vodka, so I ended up trying Rachel Ray’s recipe, found on a link through Dr. Oz’s website: Yum!

Ingredients

  • 1 tbsp extra-virgin olive oil
  • 1 tbsp butter
  • 2 cloves garlic, minced
  • 2 shallots, minced
  • 1 cup vodka
  • 1 cup chicken stock
  • 32 oz crushed tomatoes
  • coarse salt
  • pepper
  • 16 oz penne rigate
  • 1/2 cup heavy cream
  • 20 fresh leaves basil, shredded or torn

Heat a large skillet over moderate heat. Add the extra virgin olive oil, butter, garlic and shallots. Gently sauté the shallots for 3-5 minutes to develop their sweetness. Add the vodka to the pan – three turns around the pan in a steady stream will equal about 1 cup. Reduce the vodka by half, about 2 or 3 minutes. Add the chicken stock and the tomatoes. Bring sauce to a bubble and reduce heat to simmer. Season with salt and pepper.

While the sauce simmers, cook the pasta in salted boiling water until cooked to al dente (with a bite to it). While the pasta cooks, prepare your salad or other side dishes.

Stir the cream into the sauce. When the sauce returns to a bubble, remove it from the heat. Drain the pasta. Toss the hot pasta with the sauce and the basil leaves.

And now, for the meat! This one came from a less professional source… a simple food blog: Ohh yeaaa

1 1/4 pounds ground chicken
1/2 cup breadcrumbs
2 tablespoons chopped onion
1 tablespoon chopped parsley
1/2 cup Pecorino (or Parm)
salt to taste
pepper to taste
1 clove garlic, minced
1 teaspoon fennel seeds
1 egg, whisked
zest of half a lemon
3 tablespoons olive oil
1 14-ounce can storebought pizza sauce (such as Don Pepino’s)
about 4 ounces fresh mozzarella (a dozen thin slices; to pile on the cheese would be to cancel out the fact that you were virtuous enough to replace fatty beef with lean chicken)

Preheat oven to 400°F, setting rack to upper third part of oven. In a large bowl, using your hands, gently mix together first 11 ingredients. Shape into lacrosse-ball size balls (that would be somewhere between golf and tennis) and place a few inches from each other on a foil-lined baking sheet. In a small bowl, mix one spoonful of your pizza sauce with olive oil. Brush this mixture on top of each meatball. Bake for 15 minutes.

Remove meatballs from oven, spoon some sauce on top of each meatball, and cover each with a slice of cheese. Broil another 3 to 5 minutes until cheese is bubbly and golden.  Heat remaining sauce in a small saucepan. Serve meatballs with a dollop of sauce and a raw Tuscan kale salad that has been shredded and tossed with shallots, Pecornio, olive oil, salt, and pepper.

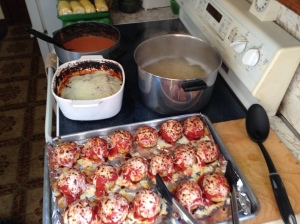
Clearly this was before I was super committed to the food photography scene, so this is all I have to offer this time around.

Ignore the random eggplant that my father was making at the timem

Ignore the random eggplant that my father was making at the time